主题
OpenClaw 配置教程
通过 Poke API 为 OpenClaw 配置自定义 Provider。以下流程按 准备 → 安装/配置 → 启动 → 验证 排列;各通道的 Base URL 均填写控制台复制出的根地址,协议类型通过 Compatibility 区分。
| 通道 | Base URL | 示例模型 | Compatibility |
|---|---|---|---|
| Anthropic(Claude) | https://www.poke2api.com | claude-opus-4-6 | anthropic |
| OpenAI(Codex) | https://www.poke2api.com | gpt-5.5 | openai-responses |
一、准备
- 在 控制台 的密钥管理中创建对应分组的 API Key。
- 安装 Node.js LTS,确认
node --version与npm --version均可执行。 - 使用可交互终端运行安装脚本。脚本会隐藏 API Key 输入,也不会在完成摘要中显示密钥。
Base URL
Claude 与 Codex 通道都填写控制台复制出的根地址,不要手动添加 /v1;选择正确的 Compatibility(anthropic 或 openai-responses)即可。直接 HTTP 调用才使用完整的 /v1/... 请求路径。
二、安装与配置
一键脚本(推荐)
powershell
irm https://docs.poke2api.com/install/openclaw.ps1 | iexbash
curl -fsSL https://docs.poke2api.com/install/openclaw.sh | bash脚本会安装 npm 包 openclaw,让你选择 Claude 或 Codex 通道,再调用 openclaw onboard 写入本地配置。API Key 通过隐藏输入读取,不会写进命令历史,也不会由脚本打印。
手动安装与配置
先安装正确的 npm 包并检查版本:
bash
npm install --global openclaw
openclaw --version
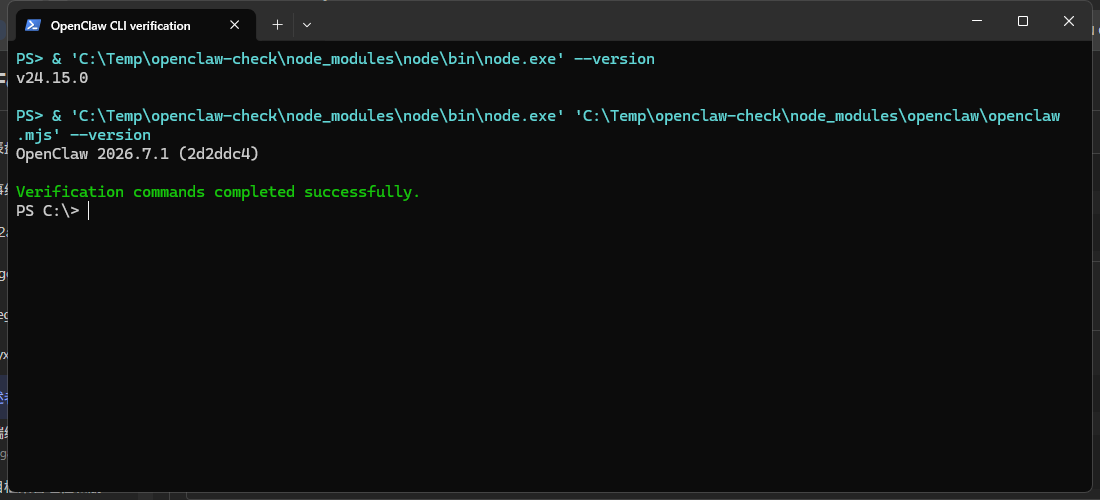
截至 2026-07-15,本文实测参考版本为 OpenClaw 2026.7.1。OpenClaw 更新频繁,若命令参数发生变化,请先运行 openclaw onboard --help,不要套用未确认的旧参数。
手动配置时也应隐藏输入。下面以支持图片输入的示例模型为例;如果改用纯文本模型,请把 --custom-image-input 换成 --custom-text-input。
bash
read -rsp "Poke API Key: " OPENCLAW_API_KEY; printf '\n'
openclaw onboard \
  --non-interactive \
  --accept-risk \
  --mode local \
  --auth-choice custom-api-key \
  --custom-base-url https://www.poke2api.com \
  --custom-model-id claude-opus-4-6 \
  --custom-api-key "$OPENCLAW_API_KEY" \
  --custom-provider-id pokeapi-claude \
  --custom-compatibility anthropic \
  --custom-image-input \
  --gateway-bind loopback \
  --no-install-daemon \
  --skip-health \
  --skip-channels \
  --skip-skills \
  --skip-search \
  --skip-ui \
  --skip-hooks
unset OPENCLAW_API_KEY
bash
read -rsp "Poke API Key: " OPENCLAW_API_KEY; printf '\n'
openclaw onboard \
  --non-interactive \
  --accept-risk \
  --mode local \
  --auth-choice custom-api-key \
  --custom-base-url https://www.poke2api.com \
  --custom-model-id gpt-5.5 \
  --custom-api-key "$OPENCLAW_API_KEY" \
  --custom-provider-id pokeapi-codex \
  --custom-compatibility openai-responses \
  --custom-image-input \
  --gateway-bind loopback \
  --no-install-daemon \
  --skip-health \
  --skip-channels \
  --skip-skills \
  --skip-search \
  --skip-ui \
  --skip-hooks
unset OPENCLAW_API_KEY
powershell
$secureKey = Read-Host 'Poke API Key' -AsSecureString
$ptr = [Runtime.InteropServices.Marshal]::SecureStringToBSTR($secureKey)
try {
  $apiKey = [Runtime.InteropServices.Marshal]::PtrToStringBSTR($ptr)
  openclaw onboard `
    --non-interactive `
    --accept-risk `
    --mode local `
    --auth-choice custom-api-key `
    --custom-base-url https://www.poke2api.com `
    --custom-model-id gpt-5.5 `
    --custom-api-key $apiKey `
    --custom-provider-id pokeapi-codex `
    --custom-compatibility openai-responses `
    --custom-image-input `
    --gateway-bind loopback `
    --no-install-daemon `
    --skip-health `
    --skip-channels `
    --skip-skills `
    --skip-search `
    --skip-ui `
    --skip-hooks
} finally {
  $apiKey = $null
  [Runtime.InteropServices.Marshal]::ZeroFreeBSTR($ptr)
}
参数兼容性
自定义 Provider 只使用已确认的参数:--auth-choice custom-api-key、--custom-base-url、--custom-model-id、--custom-api-key、--custom-provider-id、--custom-compatibility,以及二选一的 --custom-image-input / --custom-text-input。不要套用旧教程中的其他自定义参数。
三、启动
一键脚本使用本地模式、仅绑定 loopback,并且不安装后台服务。先在第一个终端启动 Gateway:
bash
openclaw gateway run保持该终端运行,再在第二个终端打开 TUI:
bash
openclaw tui四、验证
在第二个终端执行:
bash
openclaw gateway status --deep
openclaw models status
随后在 openclaw tui 中发送一条简短消息。能连接 Gateway、识别所选 Provider,并收到模型的真实回复,才表示配置完成;若出现 401,请检查 API Key、密钥分组和所选通道,切勿用伪造的成功输出代替实际请求结果。